Sharp SL-6000N Especificações Página 1
Consulte online ou descarregue Especificações para Telemóveis Sharp SL-6000N. Sharp SL-6000N Specifications Manual do Utilizador
- Página / 107
- Índice
- RESOLUÇÃO DE PROBLEMAS
- MARCADORES
- SL-6000L/SL-6000N 1
- FOR YOUR RECORDS 2
- Introduction 4
- Introduction 3 5
- Contents 6
- How to View Online Manuals 7
- Cheking the contents 8
- Start-up Guide (this book) 9
- (Software and Online 9
- Manuals, etc.) 9
- Getting Started 10
- 1. Connect the AC power 11
- 2. Plug the AC adapter 11
- 4. Make sure the Zaurus 11
- Step 2: 12
- Step 3: 13
- Setting the date and time 14
- Getting Started 13 15
- Setting your passcode 16
- Step 4: 17
- About USB Ports 18
- Windows XP 18
- Windows 2000 18
- Getting Started 17 19
- 18 Getting Started 20
- USB connector 20
- USB port 20
- Getting Started 19 21
- Adding the software 22
- Removing the software 22
- Removing all software 22
- About Your Zaurus 23
- Applications 24
- Settings 25
- 24 About Your Zaurus 26
- Part names and functions 27
- About Your Zaurus 27 29
- Display protection cover 31
- 32 About Your Zaurus 34
- Docking Station 34
- Basic Operations 35
- Operating methods 36
- Home Screen 37
- Using the taskbar 38
- Files Home Screen 39
- Reorganizing Your Files 41
- Creating a new folder 42
- Basic Operations 41 43
- 42 Basic Operations 44
- Naming folders and files 45
- Menu list 46
- Basics of Using Applications 47
- Application Fast Load 48
- 3. Press the OK key 48
- Using the Menu bar 49
- Menu operations 50
- Moving the focus 51
- Menu and shortcut icons 51
- Creating a new entry 52
- Modifying an entry 53
- Selecting from a list 53
- Drop-down list 54
- Combobox 54
- Basic Operations 53 55
- Tap here and enter 55
- Tap here 55
- Using checkboxes 56
- Using the radio buttons 56
- Categorizing entries 57
- 3. Tap the “Add” button 58
- Basic Operations 57 59
- Category checkbox 59
- 58 Basic Operations 60
- Drop-down list button 60
- Deleting entries 61
- Duplicating an entry 61
- Searching for an entry 62
- Basic Operations 61 63
- Entering Characters 64
- Basic Operations 63 65
- Software keyboard 66
- Handwriting 67
- Handwriting recognition 68
- Practicing your handwriting 68
- Setting up your preferences 69
- Customizing your handwriting 70
- Basic Operations 69 71
- Character combobox 71
- Keyboard 72
- Pickboard 73
- Pickboard bottom row 74
- Pickboard menu 74
- Entering characters 75
- Adjusting the Volume 76
- Checking the battery level 77
- Using memory expansion 78
- Removing 79
- Using Help 80
- Registering bookmarks 81
- Removing bookmarks 81
- How to Install Applications 82
- 5. Tap 85
- 7. Tap 85
- Appendix 86
- 2. Performing a Reset 87
- 3. Performing an Error check 88
- Maintaining Your System 89
- Performing an Error check 90
- Format the Zaurus 91
- Replacing the Battery 92
- Conditions of Use 93
- Environment 94
- Precautions 95
- Other precautions 96
- Troubleshooting 97
- 96 Appendix 98
- Appendix 97 99
- 98 Appendix 100
- Specifications 101
- 100 Appendix 102
- Product Support 103
- In Europe: 104
- In the U.S.A 105
- SHARP CORPORATION 107
Resumo do Conteúdo
SL-6000L/SL-6000N
8 Getting StartedGetting StartedStep 1: Inserting and charging the batteryInserting the batteryNote: Only use the “EA-BL09” rechargeable battery (supp
98 AppendixI have set a scheduled alarm but the alarm does not make a sound.• When an optional headphone is inserted into the stereo headphone jack, a
Appendix 99SpecificationsHardwareIntel® XScale™ (PXA255, 400 MHz)PlatformOS: Linux 2.4 (OpenPDA™)• Linux based embedded operating system (OpenPDA™)Mem
100 AppendixNote:• When the power of the Zaurus is turned on at a temperature of under 25°C (77°F), without any peripheral devices (including the exp
Appendix 101Product SupportPlease register on our website so we can keep you up-to-date as new products and services become available. If you have rea
In Europe:This equipment complies with the requirements of Directives 89/336/EEC and 73/23/EEC as amended by 93/68/EEC.Dieses Gerät entspricht den Anf
In the U.S.A. CONSUMER LIMITED WARRANTYSHARP ELECTRONICS CORPORATION warrants to the first consumer purchaser that this Sharp brand product (the “Prod
PRINTED IN JAPANIMPRIMÉ AU JAPON03B2.9T-TO(TINSE1300YCZZ)SHARP CORPORATION
Getting Started 9Charging the battery using the AC adapterNote: Only use the “EA-70” AC adapter (supplied).1. Connect the AC power cord to the AC adap
10 Getting StartedNote:• Charge the battery to its full capacity until the charge light turns off.• Be sure to slide the battery replacement switch
Getting Started 11Step 3: Initial settingsOpen the Display protection cover (see page 29) and carry out the initial setup of the Zaurus after completi
12 Getting StartedSetting the date and timeFor the time-critical functions to work properly, the built-in clock must be set to the current date and ti
Getting Started 137. Tap the Weeks start on drop-down list button and then select Sunday or Monday to begin the week.8. Tap the Date format drop-down
14 Getting StartedNote: You will not be able to select or enter the category name on this screen.Follow the next procedure.Setting your passcodeBy set
Getting Started 15Step 4: Installing the Software on Your PCChecking the Operating EnvironmentMinimum System Requirements• 100% IBM Compatible PC• Mi
16 Getting StartedAbout USB Ports • Activating the power saving mode (such as suspend, resume, or sleep function) of some PCs may result in the USB po
Getting Started 17Installing the PC Software and the USB Driver onto your PCUsing the accompanying CD-ROM, “Intellisync for Zaurus,” “Backup/Restore a
In the U.S.A.Declaration of ConformityPersonal Mobile Tool: SL-6000L/SL-6000NThis device complies with Part 15 of the FCC Rules. Operation is subject
18 Getting Started• If the software for the former SL-models has been installed, a confirmation dialog box for uninstallation of the software will be
Getting Started 1911.The connection will be established. If a new hardware wizard dialog box appears, follow the wizard until the USB driver is instal
20 Getting StartedAdding or Removing PC SoftwareDisplaying the screen for Add or Remove PC softwareSelect “Sharp Zaurus Software” from “Add or Remove
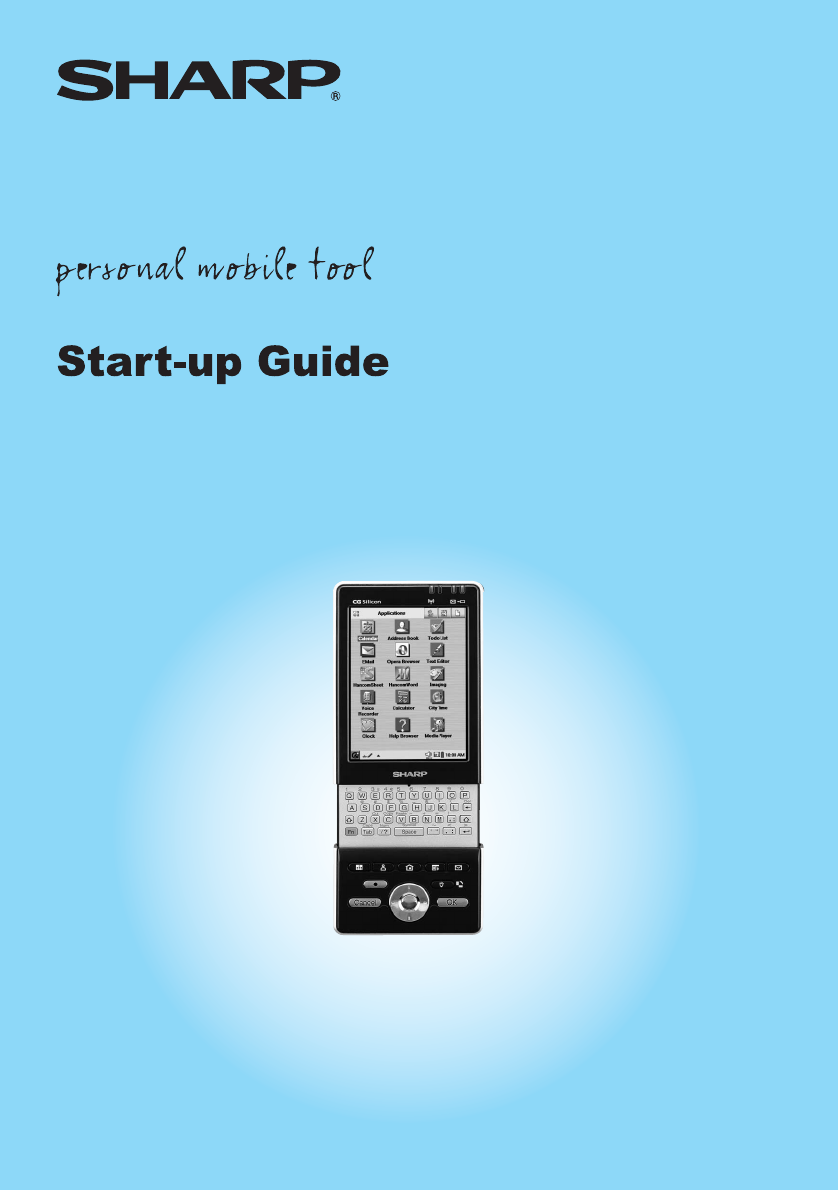
About Your Zaurus 21About Your ZaurusUseful Functions and Services of the SL-6000L/SL-6000NYour Zaurus has the following features:• A large colorful V
22 About Your ZaurusApplicationsCalendar Allows you to store events and set alarms.Address Book Allows you to add and view the list of existing names
About Your Zaurus 23SettingsLight & Power Allows you to select the amount of time that elapses before the Zaurus turns off automatically and contr
24 About Your ZaurusNote:• The EMail and Web Browser applications require the use of a modem or LAN card and a service plan.• The EMail application
About Your Zaurus 25Part names and functionsFront3.HOME key4.Menu key6.EMail key5.Back light key/Screen rotate key7.OK key8.Cursor key (Up, Down, Left
26 About Your Zaurus1. Display: Displays applications, menus, and data stored in the Zaurus.2. Address Book key: Opens the Address Book application.3
About Your Zaurus 2713. LED indicatorsCharge light (amber): Turns on when charging begins. Turns off when it is completed.When the light blinks: indic
1SARThe available scientific evidence does not show that any health problems are associated with using low power wireless devices. There is no proof,
28 About Your Zaurus30. SD card slot (for the SD memory card and Multi Media Card):Insert an optional SD memory card or Multi Media Card here.31. Micr
About Your Zaurus 29Display protection coverTo open the Display protection coverWhen carrying the Zaurus, be sure to close the cover to protect the LC
30 About Your ZaurusOpening or closing the keyboardCharging/Using the Docking Station1. Connect the AC power cord to the AC adapter.2. Plug the AC ada
About Your Zaurus 313. Plug the AC power cord into an AC outlet.4. Remove the SHARP I/O PORT cover of the Zaurus and then place the Zaurus in the Dock
32 About Your ZaurusConnecting the Zaurus to your PCUsing the Docking Station, you can connect to a PC and exchange files and data. Refer to the PC op
Basic Operations 33Basic OperationsTurning the unit on and offTurning the unit onPress to turn the power on.Note:When the battery level is low, the
34 Basic OperationsOperating methodsThe Zaurus can be operated by either pressing keys on the keyboard or tapping an item (buttons, etc.) on the scree
Basic Operations 35Home ScreenPress the Home key to display the Home screen. There are following Home screens.Press the Home key or tap one of the Nav
36 Basic OperationsUsing the taskbarQt Menu icon: Tap to display the menu. This is an another way of accessing applications in the list view.You can a
Basic Operations 37Files Home ScreenThis section gives a simple explanation of the Files Home screen. For more detailed explanations, see “Reorganizin
2 IntroductionIntroductionCongratulations and thank you for purchasing the Personal Mobile Tool.Read this Start-up Guide first. Then, refer to the Ope
38 Basic Operations• When you tap on a folder icon, the folder will open and the data files and folders contained within will be displayed.• When you
Basic Operations 39Reorganizing Your FilesYou can reorganize your files using folders in the File Home screen.Opening folders and viewing filesThis se
40 Basic OperationsCreating a new folderThis section describes how to create a new folder within the “Internal Flash” folder. If a different folder is
Basic Operations 41Changing folder and file names1. Select the folder or file you wish to rename on the Files Home screen.2. Tap the “File” menu (or t
42 Basic OperationsSetting and clearing wallpaper from the Files Home screenYou can set an image file (JPEG, BMP, GIF and PNG format) as the wallpaper
Basic Operations 43Defining the Cancel key function for the Files Home screenYou can define how the Cancel key will operate on the Files Home screen.
44 Basic OperationsMenu listFile New folder Creates a new folder (see page 40).Delete Deletes the selected file or folder. When a folder is deleted, a
Basic Operations 45Basics of Using ApplicationsThis section describes basic operations for using applications. Operations may differ in some applicati
46 Basic OperationsApplication Fast LoadSome applications may take a while to launch when there is a large amount of data associated with the applicat
Basic Operations 47Tapping an entry in the Index screen will also display the Detail screen.Note:For data intensive applications, the screen might dis
Introduction 3Conditions for using SHARP original softwareSHARP CORPORATION (hereafter referred to as “SHARP”), under the following conditions, grants
48 Basic OperationsMenu operations1.Press the Menu key or tap the desired menu command. The menu will open.Note: Pressing the Menu key again will clos
Basic Operations 49Moving the focusThe focus is moved using the cursor key. Focused items (entry, tab, shortcut icon, etc.) are enclosed by a dotted l
50 Basic OperationsCreating a new entry1. Tap the New icon ( ).The new entry screen for the selected application will be displayed.Note: Instead of st
Basic Operations 51Modifying an entryOpen the Edit screen1.On the Index screen, select an entry you want to modify.2. Tap the Edit icon ( ).The Edit s
52 Basic OperationsDrop-down list1.Tap the drop-down list button and select from the displayed list.Combobox1.Tap the Combobox button at the right edg
Basic Operations 532. When the desired entry does not appear on the displayed list, tap the field and enter the information there.Spinbox1.Tap or
54 Basic OperationsUsing checkboxesYou can select items by placing a checkmark or deselect them by removing the checkmark.1. Tap a checkbox to place a
Basic Operations 55Categorizing entriesOnce you categorize an entry, you will be able to display the entry in the appointed category (Address Book and
56 Basic Operations3. Tap the “Add” button.The Add screen will appear for entering a new category name.4. Enter the new category name and then tap .T
Basic Operations 575. Tap or press the OK key to save the setting.Note:• If you tap the Category drop-down list button on the New Entry or Edit scr
4 ContentsContentsIntroduction...2Contents ...
58 Basic OperationsViewing the entries of a specified category onlyIn the Index screen of the Address Book or Todo List applications, you can display
Basic Operations 59Note: The “New Event” screen for inputting an event entry for the Calendar application includes a Category setting. This setting is
60 Basic OperationsChanging the display font size(For the Address Book, Todo List, and the Detail screen of the Calendar, Text Editor and EMail applic
Basic Operations 613. Tap “Find Next” to continue the search in the remainder of the entries, or “Find Prev” to search the previous part of the entrie
62 Basic OperationsEntering CharactersThe Zaurus provides two ways of entering characters: using the hardware keyboard and software keyboard.Using the
Basic Operations 63 key as combination key when held downTyping in textTyping text is simple and straightforward.Press a key to enter the correspondin
64 Basic OperationsSoftware keyboardBy default, “ ” will appear at the bottom left of the screen.Tap the Input methods menu icon ( ) to pop up a list
Basic Operations 65HandwritingPop up the input area in the handwriting mode.Write a letter with the stylus.There are three input areas: Uppercase lett
66 Basic OperationsHandwriting recognitionTap the Help button of the Handwriting input method to view the tips or to use the trainer.The Tips screen w
Basic Operations 67You can confirm your performance in the area above the input area showing the matched rate (%) of the character you wrote and the m
Contents 5Organization of the Operation ManualsThis operation manual describes both the SL-6000L and SL-6000N. The SL-6000L is equipped with an intern
68 Basic OperationsIf you want to have only a lowercase input area, select “Lower case (toggle Upper case)” by tapping the radio button. In this case,
Basic Operations 69Recognizing your handwritingThe input area shows the corresponding character selected in the character list.This demonstrates the w
70 Basic Operations“Character” comboboxThe choices are as follows: [Esc], [Tab], [BackSpace], [Return], [Uppercase], [Caps Lock], [Shortcut], [Punctua
Basic Operations 71PickboardThe Pickboard will provide fast text input using a minimum amount of screen space.Pull up the pickboard mode in the input
72 Basic OperationsPickboard bottom rowTapping letter groups will enter words.The Pickboard will present a list of letters and words at the top of the
Basic Operations 73UnicodeUse Unicode mode to insert special characters and symbols.Entering charactersUnicode characters are collected in groups.To c
74 Basic OperationsAdjusting the VolumeVolume setting allows you to adjust the volume setting of the built-in speaker and the stereo headphone to list
Basic Operations 75Checking the battery level1. Tap the Battery icon on the taskbar to check the battery level.The Battery Status screen will appear.T
76 Basic OperationsUsing memory expansionYou can use a CompactFlash card, an SD memory card or a Multi Media Card.The Zaurus automatically recognizes
Basic Operations 77Caution:• Only insert the card after the start-up routine has been completed (the keyboard and other function keys will be fully o
6 Cheking the contentsCheking the contentsPersonal Mobile Toolwith Display protection coverStylus (inserted in the unit)CF Slot Protection Card (inser
78 Basic Operations4. After the CF (or SD) icon disappears, remove the CF card straight out.Or push the SD memory card or Multi Media Card inwards slo
Basic Operations 79Registering bookmarksBy registering frequently-used pages, you can easily jump to the page.1. Display the Help Browser page you wan
80 How to Install Applications on Your ZaurusHow to Install Applications on Your ZaurusThis section provides the procedures for installing software fr
How to Install Applications on Your Zaurus 814. Double-click on the CD-ROM drive name (example: D) in the My Computer application on your PC.The menu
82 How to Install Applications on Your Zaurus8. Drag the file from the Applications folder of the CD-ROM and drop it into the “Install_Files” folder o
How to Install Applications on Your Zaurus 834. Tap “Internal Flash” to select it.5. Tap .The installation will begin.6. Tap “OK” on the confirmation
84 AppendixAppendixWhat to do if a problem occursWhen a problem occurs, first refer to the Troubleshooting section (see page 95) and the “Troubleshoot
Appendix 852. Performing a ResetWhen a Reboot cannot be performed, or the Zaurus does not work correctly even when rebooted, try the following reset o
86 Appendix2. Press the reset switch with the supplied stylus pen while holding the Rec and POWER keys.3. Release the Rec and POWER keys.4. Turn the Z
Appendix 87Maintaining Your SystemZaurus system maintenance can be performed from the Maintenance menu.You need to display the Maintenance menu first,
Cheking the contents 7Note: The AC power cord plug may differ in some countries.Start-up Guide (this book)CD-ROM(Software and OnlineManuals, etc.)
88 AppendixNote: If you select the wrong menu, press the Cancel key to return to the Maintenance menu screen.Performing an Error checkThe Error check
Appendix 89Format the ZaurusFormatting the Zaurus will erase all data on the Zaurus and then re-format the memory.Caution: Any settings or add-on soft
90 AppendixReplacing the BatteryCaution:• Before sliding the battery replacement switch to the “ ” position, make sure that the Zaurus is turned off
Appendix 91Conditions of UseYour Zaurus conforms to international regulations insofar as it is used under normal conditions and in accordance with the
92 AppendixBattery• The Zaurus consumes battery power even when turned off.• Before removing the battery from the Zaurus, make sure the Zaurus is turn
Appendix 93PrecautionsAC adapter and AC power cordIf the following precautions are not observed, fire or electric shock may occur.• Only use the “EA-7
94 Appendix• After storing the battery for a long period of time, be sure to charge the battery completely prior to use.• Charge the battery properly,
Appendix 95TroubleshootingIf you have a problem with your Zaurus, check the following points.If the problem remains, contact our Support center.The sc
96 Appendix• The battery may be exhausted. Use the AC adapter to turn on the power if necessary, and after disconnecting the adapter tap the battery i
Appendix 97Entries in the Calendar application, etc. cannot be deleted.•When the user area of the memory is full, entries in the Calendar, Address Boo
Mais documentos para Telemóveis Sharp SL-6000N

Manuais e produtos relacionados com Telemóveis Sharp SL-6000N
 (1 páginas)
(13 páginas)
(162 páginas)
(156 páginas)
(156 páginas)
(132 páginas)
(155 páginas)
(87 páginas)
(448 páginas)
(171 páginas)
(240 páginas)
(1 páginas)
(13 páginas)
(162 páginas)
(156 páginas)
(156 páginas)
(132 páginas)
(155 páginas)
(87 páginas)
(448 páginas)
(171 páginas)
(240 páginas)
© 2020, manymanuals-pt.com. Todos os direitos reservados. | 0.049 s |
 Manymanuals.com
 Manymanuals.de
 Manymanuals.fr
 Manymanuals.it
 Manymanuals.pl
 Manymanuals.cz
 Manymanuals.es
 Manymanuals-pt.com
Comentários a estes Manuais